mac搭建个人博客(hexo+git)
1.基本环境要求
有git,node。
2.开始搭建
- 在git上新建一个仓库,名为xxx.github.io,xxx是你github名字不能出错
- 打开终端输入
npm install -g hexo-cli
- 创建存储博客文章的文件夹(随便哪里你能找到就行),在该目录下打开终端
- 初始化
hexo init
- 启动本地服务
hexo s 也可是 hexo server
- 关联到git,打开存储博客文章的文件夹,找到MyBlog中的_config.yml文件,更改
deploy配置(搜索deploy),记得将xxx换成自己的git名。
1
2
3
4
| deploy:
type: git
repo: git@github.com:xxx/xxx.github.io.git
branch: master
|
之后输入
1
2
3
4
5
6
7
| npm install hexo-deployer-git --save
#清除缓存
hexo clean
# 产生静态网页
hexo g
# 部署到GitHub page上
hexo d
|
- 此时打开浏览器输入xxx.github.io应该就可以访问你的博客了。
- 编辑博客
这样会在本地博客的source->_posts路径下看到新建的文章,是md格式的,找一个markdown文本编辑器进行编辑即可。
1
2
3
4
| hexo clean && hexo g && hexo s
hexo clean && hexo g && hexo d
|
- 再次打开浏览器,输入xxx.github.io就可以看到你的新博客了。
3.改变主题
默认的主题很丑,我们可以在官网上查看我们喜欢的主题,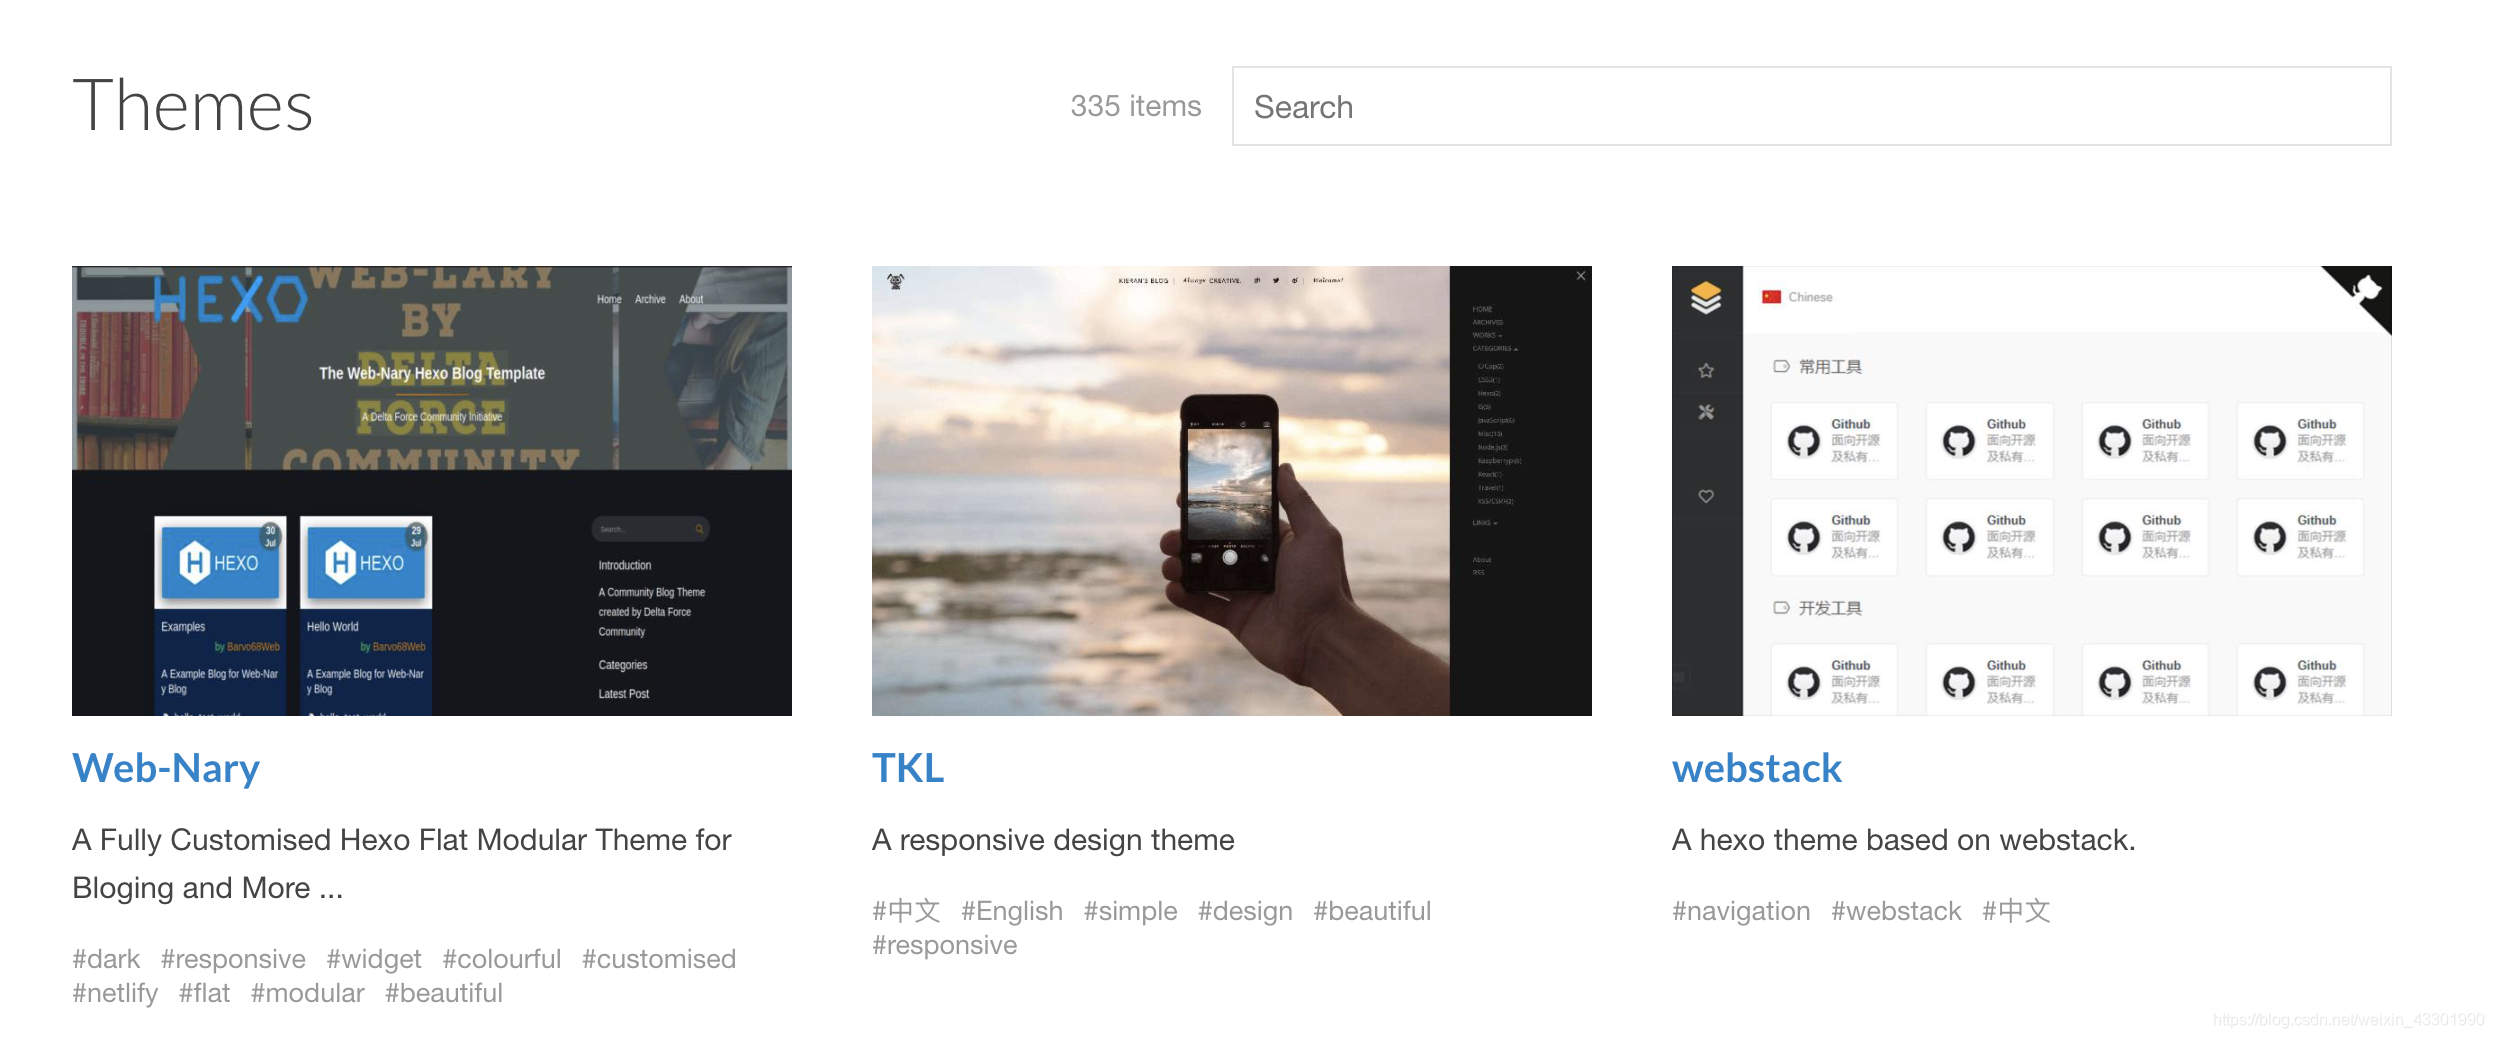
要点击主题名字这里复制代码,点击上面的图片会进入预览界面,比如点击TKL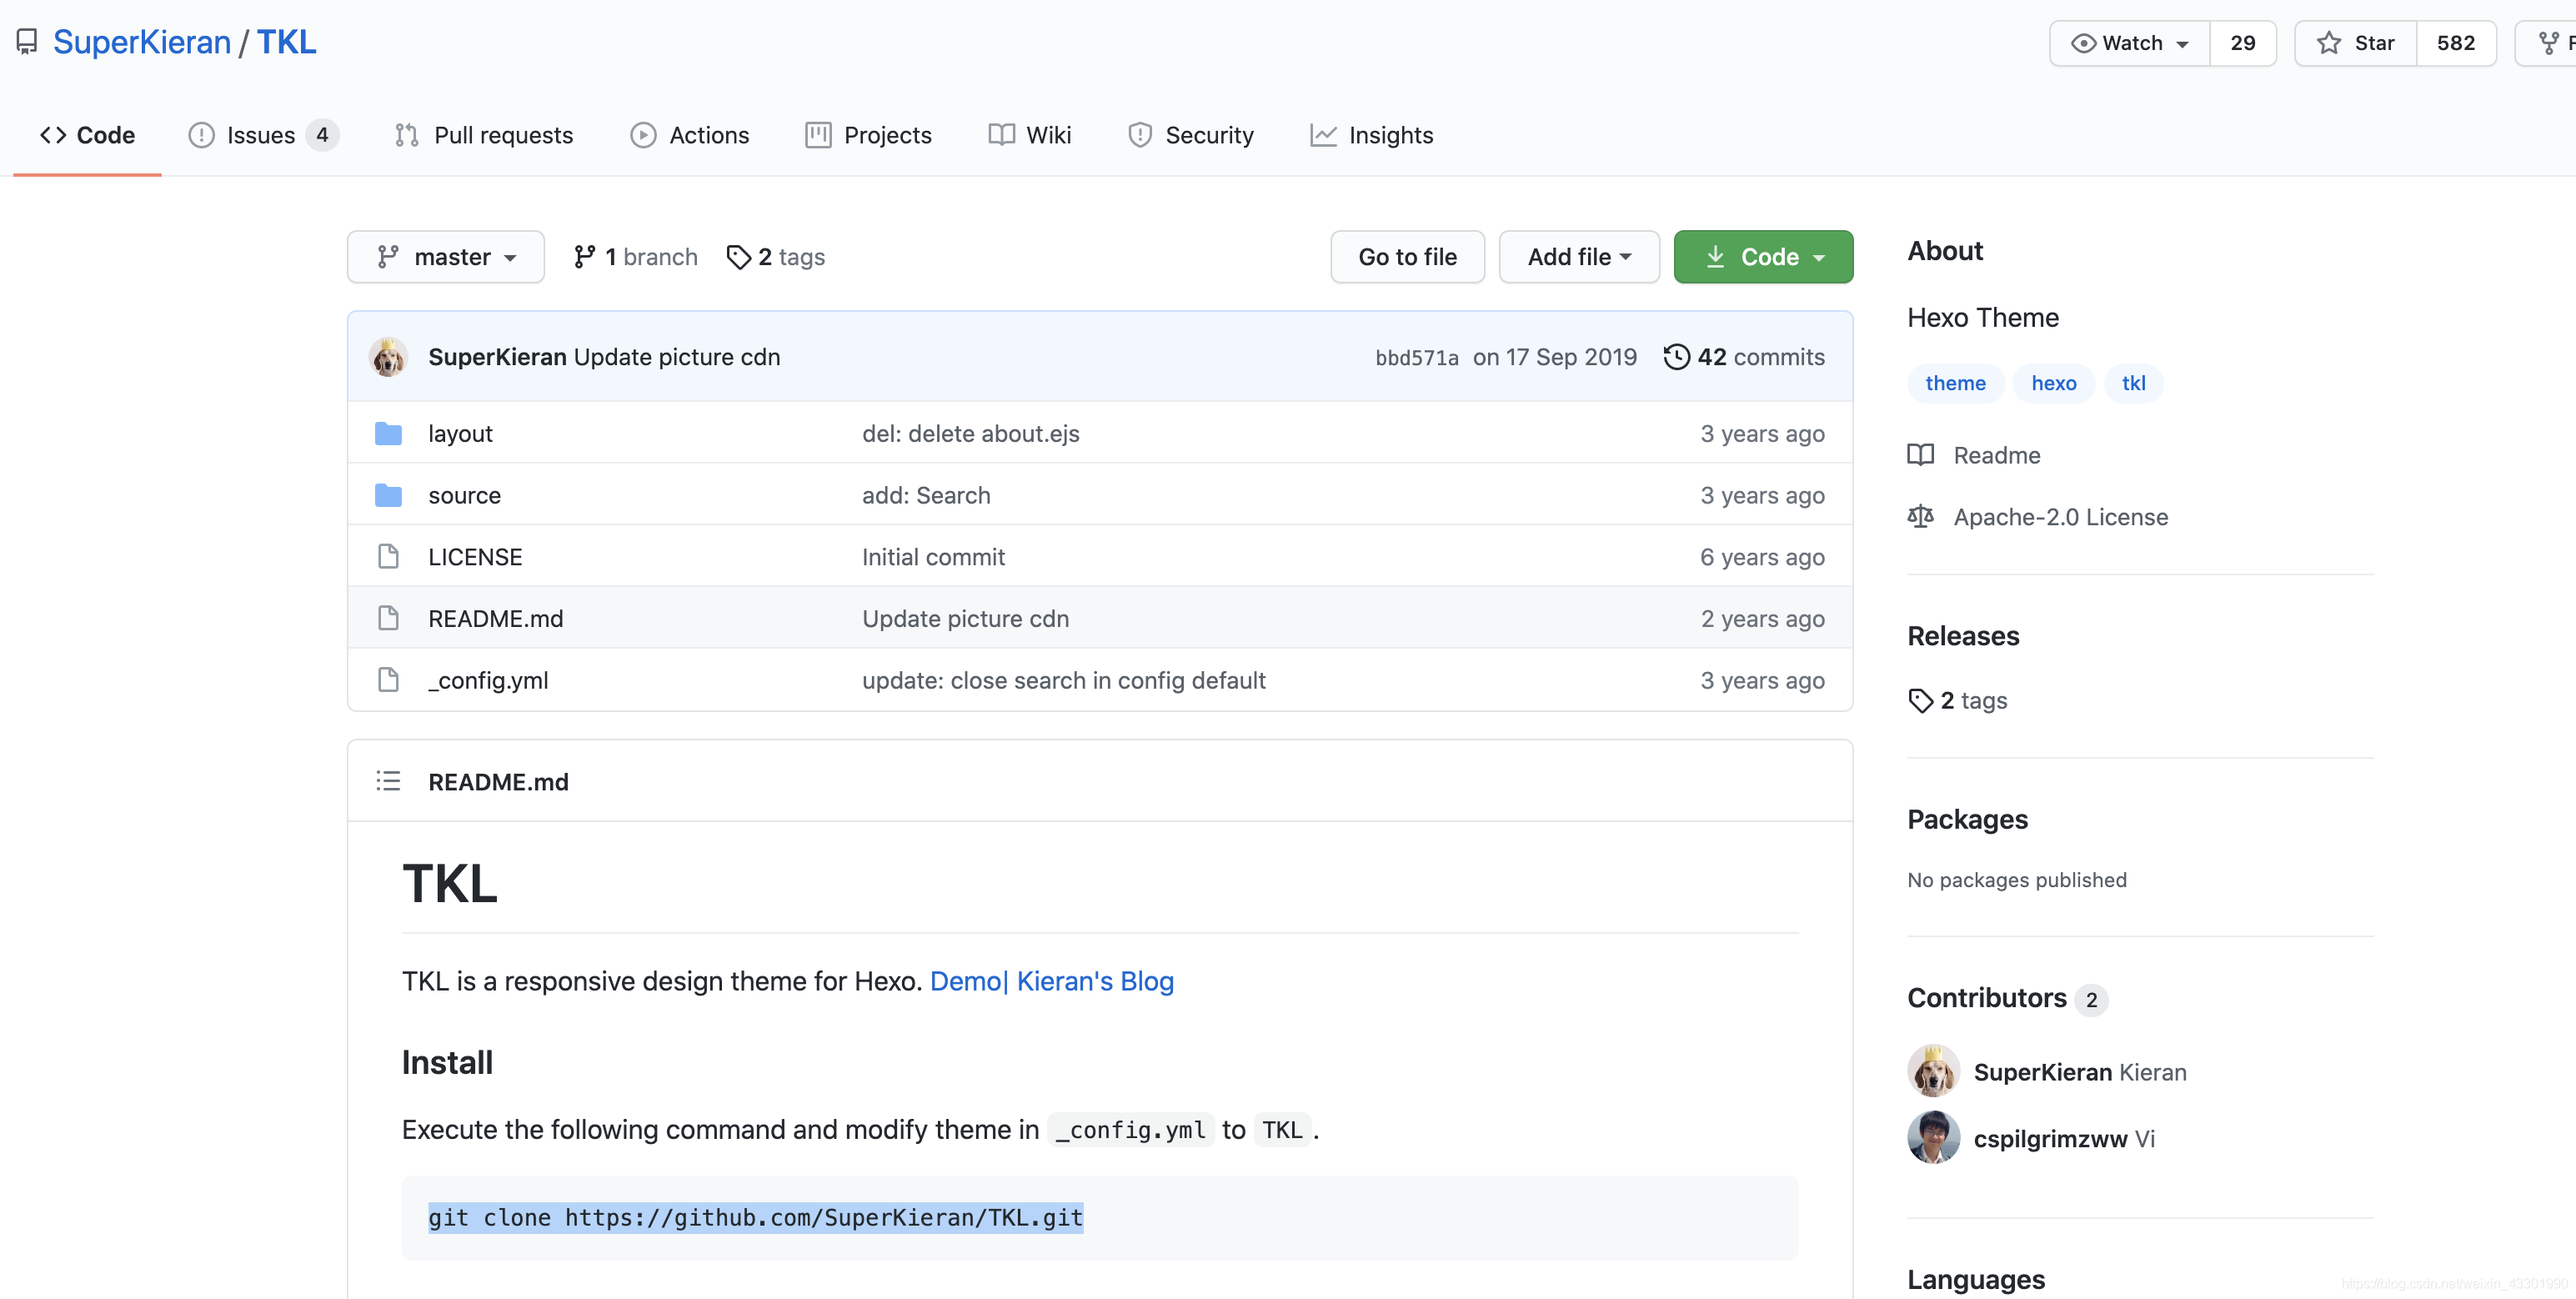
克隆代码到themes文件夹,然后打开_config.yml文件,将theme后面的主题改成TKL(与themes文件夹里的主题名一样)就好了。
运行hexo clean && hexo g && hexo s本地预览
感觉没问题后,运行hexo clean && hexo g && hexo d上传到git
最后的文件结构是这样的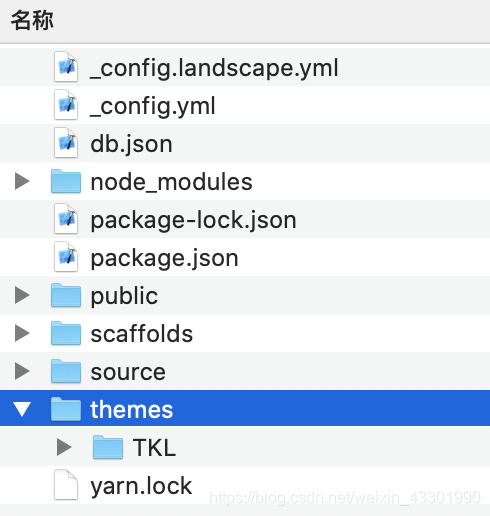
4.删除博客
找到本地md文件删除,然后hexo g&&hexo d发布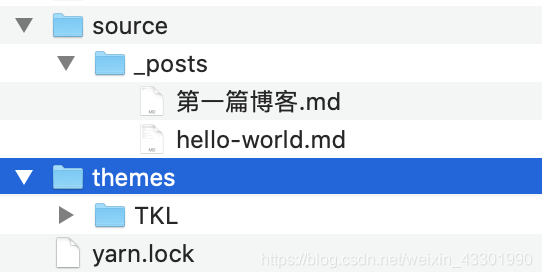
5.插入图片及改变图片大小
绝对路径:当Hexo项目中只用到少量图片时,可以将图片统一放在source/images文件夹(自己新建)中,通过markdown语法访问它们,md文件中加入这样的代码即可。
相对路径:图片除了可以放在统一的images文件夹中,还可以放在文章自己的目录中。文章的目录可以通过配置_config.yml来生成。找到_config.yml文件的post_asset_folder,设置为true。
再运行hexo new a的时候,会生成一个a文件夹,将图片存入这里就好,这样就可以在md文件中这样使用了
下面的这种语法也可以,同时可以简单控制宽和高
1
2
| <img src="/image/test.jpg" width="50%" height="50%">
<div style="width:70%;margin:auto">{% asset_img abc.png 图片信息描述 %}</div>
|
上述是markdown的引用方式,图片只能在文章中显示,但无法在首页中正常显示。
如果希望图片在文章和首页中同时显示,可以使用标签插件语法
1
| {% asset_img image.jpg This is an image %}
|
6. 插入访问量统计
博主是这样添加的:
打开themes>你的主题>layout>_partial>foot.ejs(你也可以选择添加在head中),找一个合适的位置添加如下代码
1
2
3
4
5
| <script async src="//busuanzi.ibruce.info/busuanzi/2.3/busuanzi.pure.mini.js"></script>
<div class="num">
本站总访问量<span id="busuanzi_value_site_pv"></span>次
本站访客数<span id="busuanzi_value_site_uv"></span>人次
</div>
|
之后在博客目录下运行hexo g&&hexo s 本地查看预览,位置应该是不对的,之后需要找到css文件,自己写一些样式调整位置,
这也是为什么我要用div包裹访问量的原因,css文件在这个目录
打开themes>你的主题>source>css>xxx.css,找到你添加文件引入的css对应的文件,添加一个样式就好了,博主是这样添加的
1
2
3
4
5
6
7
8
9
10
11
12
13
14
15
16
17
18
19
20
21
22
23
| <%- css(//可以看到css文件名是food.css
<div class="footer">
<script src='//unpkg.com/valine/dist/Valine.min.js'></script>
<script async src="//busuanzi.ibruce.info/busuanzi/2.3/busuanzi.pure.mini.js"></script>
<div class="Copyright">
©<%= new Date().getFullYear() %> By <%- theme.author %>. 主题:<a
style="text-decoration: none;display: contents; color: #898F9F;"
href="https://github.com/qiaobug/hexo-theme-quiet">Quiet</a>
</div>
<div class="num">
本站总访问量<span id="busuanzi_value_site_pv"></span>次
本站访客数<span id="busuanzi_value_site_uv"></span>人次
</div>
<div class="contact">
<% theme.bottomIcon.forEach(item =>{%>
<a href="<%= item.toUrl %>">
<img src="<%= item.iconLink %>" alt="Quiet主题">
</a>
<% }) %>
</div>
|
1
2
3
4
5
6
7
8
9
|
.footer .num {
color: #898fa0;
font-size: 14px;
position: absolute;
Left: 277px;
Top:200px;
}
|
调整之后位置就正常多了,此时在 hexo g&&hexo d发布就OK
添加评论功能
这个就简单多了,还是在刚才的foot.ejs文件,添加如下代码:
1
2
3
4
5
6
7
8
9
10
| <script src='//unpkg.com/valine/dist/Valine.min.js'></script>
<div id="vcomments"></div>
<script>
new Valine({
el: '#vcomments',
appId: 'ILzDplESxkz91zaM1QP2wGHE-gzGzoHsz',
appKey: 'f0TIia4kJVeN4IrpdShFn1jq'
})
</script>
</div>
|
最后整个foot.ejs文件是这样的:
1
2
3
4
5
6
7
8
9
10
11
12
13
14
15
16
17
18
19
20
21
22
23
24
25
26
27
28
29
30
31
32
33
34
35
36
37
38
39
40
41
| <%- css(
<div class="footer">
<script src='//unpkg.com/valine/dist/Valine.min.js'></script>//评论模块引入的js文件
<script async src="//busuanzi.ibruce.info/busuanzi/2.3/busuanzi.pure.mini.js"></script>//访问统计引入的js文件
<div class="Copyright">
©<%= new Date().getFullYear() %> By <%- theme.author %>. 主题:<a
style="text-decoration: none;display: contents; color: #898F9F;"
href="https://github.com/qiaobug/hexo-theme-quiet">Quiet</a>
</div>
//访问统计新增代码
<div class="num">
本站总访问量<span id="busuanzi_value_site_pv"></span>次
本站访客数<span id="busuanzi_value_site_uv"></span>人次
</div>
//访问统计新增代码
<div class="contact">
<% theme.bottomIcon.forEach(item =>{%>
<a href="<%= item.toUrl %>">
<img src="<%= item.iconLink %>" alt="Quiet主题">
</a>
<% }) %>
</div>
//评论功能新增代码
<div id="vcomments"></div>
<script>
new Valine({
el: '#vcomments',
appId: 'ILzDplESxkz91zaM1QP2wGHE-gzGzoHsz',
appKey: 'f0TIia4kJVeN4IrpdShFn1jq'
})
</script>
</div>
//评论功能新增代码
<%- partial(
<script>
console.log('\n %c Hexo-Quiet 主题 %c https://github.com/QiaoBug/hexo-theme-quiet \n', 'color: #fadfa3; background: #030307; padding:5px 0;', 'background: #fadfa3; padding:5px 0;')
</script>
|
最后附上我的博客